Disclaimer: Shadow Article
Topics Discussed:
- Tensors
- Basic Operations. (Inline, Tensor Indexing, Slicing)
- Numpy-PyTorch Bridge
- PyTorch-Numpy Bridge
- Variable
- Gradients
What is PyTorch? It’s a Python based package for serving as a replacement of Numpy and to provide flexibility as a Deep Learning Development Platform.
Why PyTorch? I encourage you to read Fast AI’s blog post for the reason of the course’s switch to PyTorch. Or simply put: Dynamic Graphs More intuitive than TF (Personal View)
Tensors Tensors are similar to numpy’s ndarrays, with the addition being that Tensors can also be used on a GPU to accelerate computing. Tensors are multi dimensional Matrices.
torch.Tensor(x, y)
This will create a X by Y dimensional Tensor that has been instantiated with random values. To Create a 5x3 Tensor with values randomly selected from a Uniform Distribution between -1 and 1,
torch.Tensor(5, 3).uniform_(-1, 1)
Tensors have a size attribute that can be called to check their size
print(x.size())
Operations PyTorch supports various Tensor Functions with different syntax: Consider Addition:
Normal Addition
y = torch.rand(5, 3)
print(x + y)
Getting Result in a Tensor
result = torch.Tensor(5, 3)
torch.add(x, y, out=result)
In Line
y.add_(x)
Inline functions are denoted by an underscore following their name. Note: These have faster execution time (With a higher memory complexity tradeoff)
All Numpy Indexing, Broadcasting and Reshaping functions are supported Note: PyTorch doesn’t support a negative hop so [::-1] will result in an error
print(x[:, 1])
y = torch.randn(5, 10, 15)
print(y.size())
print(y.view(-1, 15).size())
Types of Tensors
PyTorch supports various types of Tensors:
Note: Be careful when working with different Tensor Types to avoid type errors
Types supported:
32-bit (Float + Int)
64-bit (Float + Int)
16-bit (Float + Int)
8-bit (Signed + Unsigned)
Numpy Bridge
Converting a torch Tensor to a numpy array and vice versa is a breeze.
Note: The torch Tensor and numpy array will share their underlying memory locations, and changing one will change the other.
a = torch.ones(5)
b = a.numpy()
CUDA Tensors
Moving the Tensors to GPU can be done as:
if torch.cuda.is_available():
    x = x.cuda()
    y = y.cuda()
    x + y
Autograd: automatic differentiation

Central to all neural networks in PyTorch is the autograd package. Let’s first briefly visit this, and we will then go to training our first neural network.
The autograd package provides automatic differentiation for all operations on Tensors. It is a define-by-run framework, which means that your backprop is defined by how your code is run, and that every single iteration can be different.
Let us see this in more simple terms with some examples.
Variable
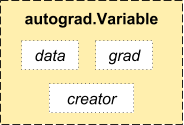
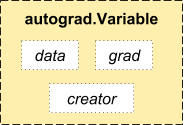
autograd.Variable is the central class of the package. It wraps a Tensor, and supports nearly all of operations defined on it. Once you finish your computation you can call .backward() and have all the gradients computed automatically.
You can access the raw tensor through the .data attribute, while the gradient w.r.t. this variable is accumulated into .grad.

x_data = [1.0, 2.0, 3.0]
y_data = [2.0, 4.0, 6.0]
w = Variable(torch.Tensor([1.0]),  requires_grad=True)
Calling the Backward function
l = loss(x_val, y_val)
l.backward()
Common Pitfalls As explained by this Blog Post by Radek, My friend and Mentor from the Fast AI community
- Gradients accumulate everytime you call them, by default, be sure to call zero.gradient() to avoid that
- Data Types, As mentioned in the Tensor Section, PyTorch supports various Tensor types. Be sure to check for the types to avoid Type compatibility errors.
Feel free to ask any questions below. Also drop us a comment on the tutorials that you’d love to read, I will try to have that up ASAP.
 Featurepreneur Articles