
This is a prequel to my previous blog post My first deep learning model using PyTorch. In this tutorial I will be covering basic know how about pytorch tensors.
PyTorch is a python based deep learning framework developed by Facebook’s AI Research. It has gained popularity because of it’s flexibility and speed. It has been integrated with cloud platforms including Amazon’s Sagemaker , Google’s GCP and Azure machine learning service.
So let’s start with understanding what exactly are tensors!!
What are tensors?
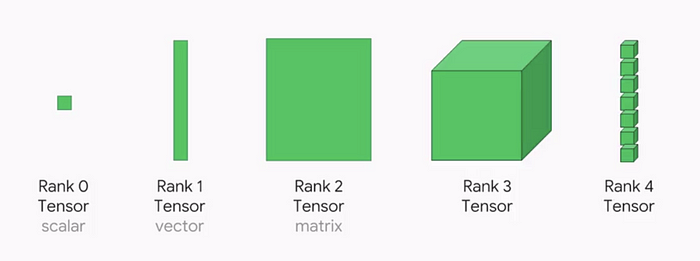
Tensors are containers that can have data in N-dimensions . A general tensor is represented by N^R where R is rank and N is number of dimensions. From this perspective, a rank-2 tensor (requires N ^2 numbers to describe) is equivalent to an N*N matrix. Scalar can be considered as a rank-0-tensor and vector can be introduced as a rank-1-tensor.
Tensors and NumPy
Tensors are similar to numpy ndarray. Pytorch is targeted as a replacement for numpy to use the power of GPUs. By copying an array to the GPU memory, performance gets improved due to parallel computing.
1. Tensor Creation
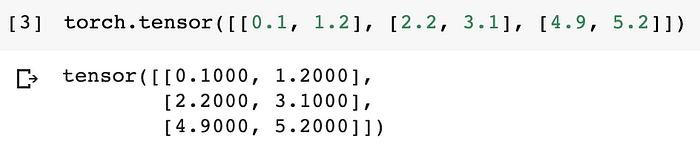
Although in tensor creation documentation by PyTorch you will find multiple ways to create tensors. Here, I am discussing few popular methods. a) torch.tensor — This is used to create a tensor with pre-existing data.
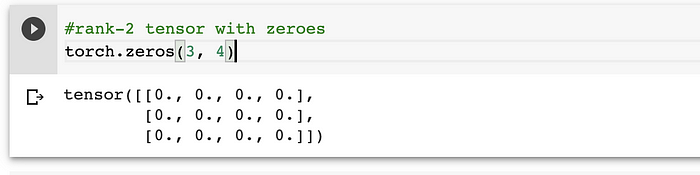
b) torch.zeros — this method returns a tensor filled with zeroes with shape defined as per the arguments.
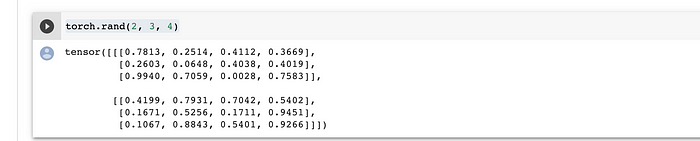
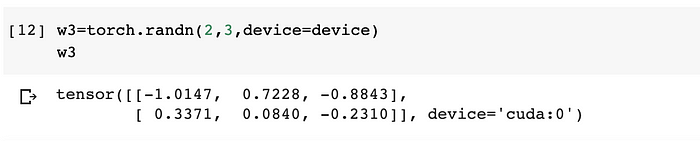
c) torch.rand —this method returns a tensor filled with random numbers from a uniform distribution on the interval [0, 1). Similarly for normal distribution torch.randn can be used.
d) torch.from_numpy — It creates a tensor from numpy ndarray . The returned tensor and numpy ndarray will share the same memory . Modifications to the tensor will be reflected in the ndarray and vice versa.
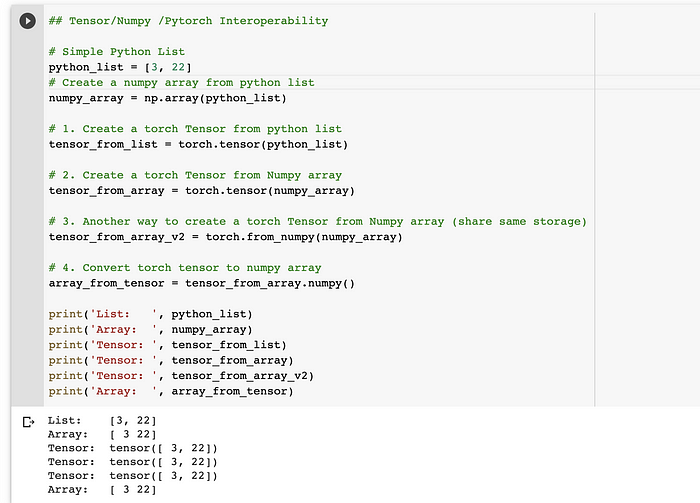
Pytorch aims to be an effective library for computations. It avoids memory copying if it can and i.e. the core difference in creating a tensor from numpy array using torch.from_numpy than torch.tensor.
Other methods like torch.randn, torch.as_tensor, torch.empty, etc. can be explored for tensor creation too.You can refer here full list .
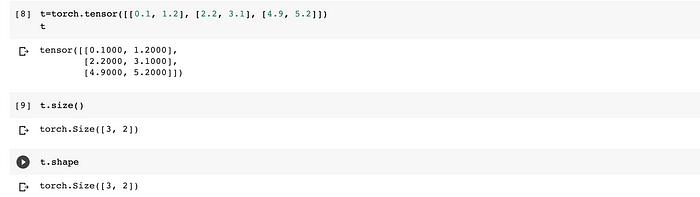
2. Tensor dimensions
To view shape of a tensor in PyTorch both size() and shape can be used. Shape is an alias to size() and that’s what numpy users would be accustomed to. It is added to match numpy closely.
3. Transforming tensor shapes
To change shape of tensors , view and reshape can be explored. Let’s understand more about both of these methods in detail.
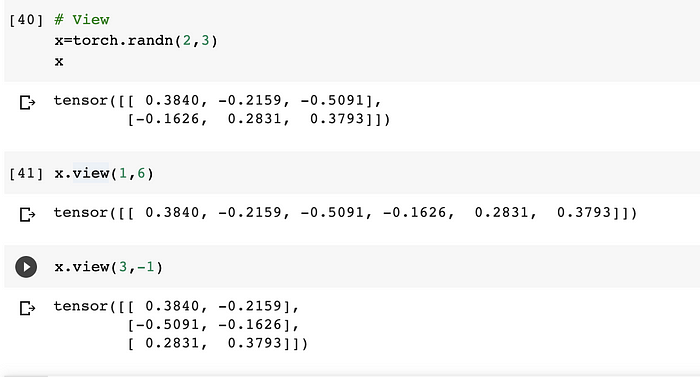
a) view
view method returns a new tensor with same data but different shape .
- view method can be called specifying the new dimensions as arguments .
- Another way can be specifying a dimension as -1 which can be inferred from other dimensions.
The new tensor will always share its data with the original tensor, implying a change in the original tensor will change the reshaped tensor and vice versa.
b) reshape
To change the shape of the tensor there is another method — reshape. It always returns the tensor with the desired shape and tries to reuse the memory. If it cannot reuse memory , it creates a copy. To show a tensor’s memory address we can use tensor.data_ptr().
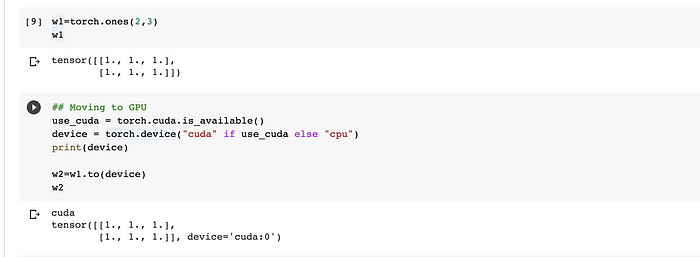
- Using CUDA
To utilise full potential of tensors , we need to move these to GPU. For Google Colab, you might need to change settings under Runtime tab and select hardware accelerator for using GPU. to() method can be used to perform device conversion.torch.device contains a device type (cuda or cpu) specifying where the tensor will be allocated.
Another method can be to set the device of a tensor during creation operation itself using device keyword argument
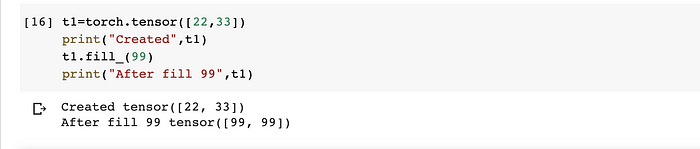
- fill_ ( An Inplace Function)
In PyTorch, any operation that mutates a tensor in-place has an underscore after the function name . It changes directly the content of a given tensor without making a copy.
Examples — .add_(),.fill_(). fill_ returns a tensor filled in-place with the specifies argument value .
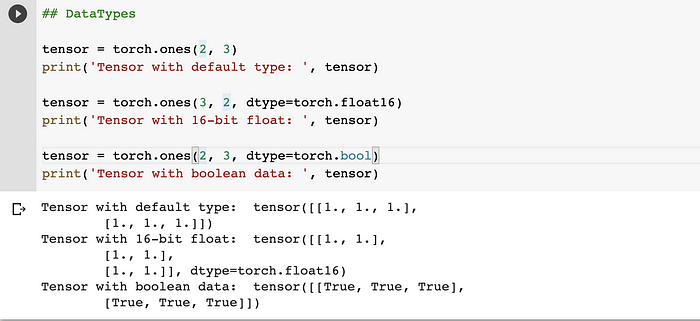
- Datatypes
A tensor of specific data type can be constructed by using torch.dtype while creating tensor. Torch defines tensor types for both CPU and GPU variants. Eg. torch.float16, torch.float32, torch.bool.
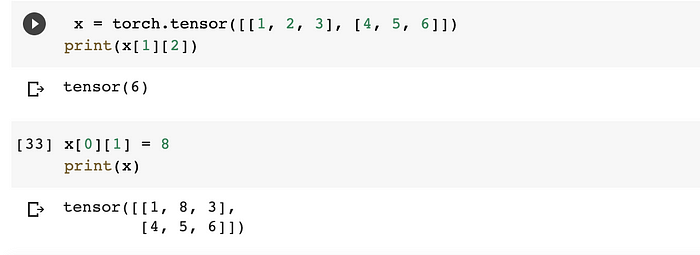
- Indexing
Tensor provides access to its elements via the same [] operation as a regular python list or numpy array.
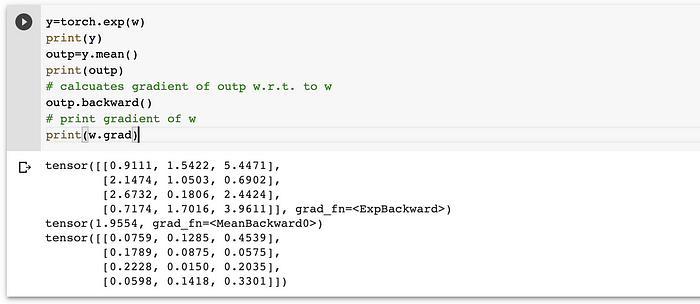
- AutoGrad with tensors
Pytorch’s way to provide automatic differentiation is through autograd. It calculates the gradient for multiple dimensions automatically and in a computationally efficient way. It calculates the gradients and keeps track in forward and backward passes. In the forward pass, we calculate the loss. In the backward pass, we calculate the gradient of the loss with respect to each of the weights.

To disable gradient calculation, torch.no_grad i.e. context-manager can be used. It is implemented in test phase while building neural network.
So that’s it. You made till the end!! This was more about getting to know basics of Pytorch tensors. In next post we will continue digging deep into other PyTorch fundamentals.
You can refer Google colab notebook for the code here.
References:-