
Summary: Playing around with the code is the fastest way of learning. In this blog post we will learn create tensors using PyTorch with code examples.
Introduction to “Tensors” series Here is the link to all the posts of Introduction to “Tensors” series: Introduction to “Tensors”
Introduction to PyTorch Tensors
Tensor Operations using Pytorch — 1
Tensor Operations using Pytorch — 2
If you have not read the PART-1 of “Introduction to “Tensors” Series” in which, we had discussed what a tensor is? How does it differ from Matrix and also, some real world usage examples! Please do read it.
In this post we are going look at how to use tensors or compute different operations using PyTorch. So, what are we waiting for?! Let’s begin….
Before we begin, remember, “tensors are nothing but a generalized form of matrix”.
Points to remember about tensors: Tensors contain data of a uniform data type (dtype)
Each dtype, has CPU and GPU version and tensor operations among the tensors must happen between the tensors of SAME dtype!
Tensors computation between tensors depends on the dtype and the device.
So, what does that mean? I said “Tensors contain data of a uniform data type (dtype)” . Just like in any programming languages you might have worked with and no i don’t mean “Python” ( Python does the job for us and makes our lives easier . Hence, one of the most liked beginner friendly languages!), think of C or Java, each data we enter have their own type, right! When we want to enter just one alphabet like ‘s’ / ‘f’/ ‘g’ etc we called it?…..Yes a “char”! What if, its a number? which is what we will be dealing with in deep learning it could be an “int”, “float”, “double”…remember!
Don’t worry if you don’t! Let’s just forget about others and focus on only two data type “int” and “float”. Here, in deep learning, we will be dealing with these two and most of the time you won’t have to worry about them! In general, if you remember from C language, “int” data type stores integer numbers and previously had a size of 2 bytes but now a days it has 4 bytes just like float!
Difference between int and float data types in general:
- Int stores integers and float stores decimal values.
- Int and float both now-a-days (in C) are of size 4 bytes.
Example for “int” : 1234 or 34 Example for “float” : 234.567 or 0.87356
A torch.Tensor is a multi-dimensional matrix containing elements of a single data type. ( we call a tensor via torch library using a dot operator!)
Torch defines nine CPU tensor types and nine GPU tensor types:
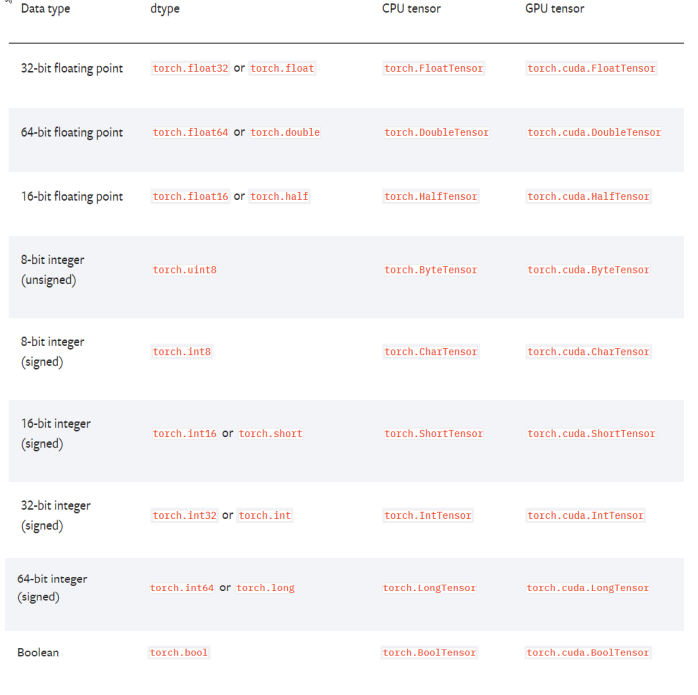
torch.Tensor is an alias for the default tensor type (torch.FloatTensor).
That’s enough of theory! Lets get our hands dirty!! …
Creating tensors using data (existing data or a variable with data in it) Assuming you have your jupyter notebook set up! (using Anaconda)
Step — 1 : import all dependencies

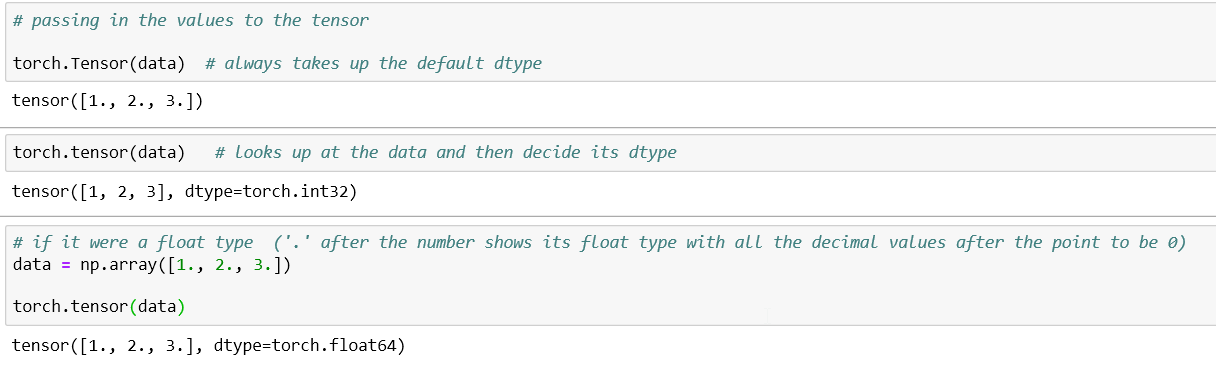
Step-2: Passing in the data

torch.Tensor VS torch.tensor All you need to know is that, torch.Tensor uses global default dtype (float32) and gives the result same as torch.FloatTensor(), whereas torch.tensor infers data type from data. For better understanding read this.
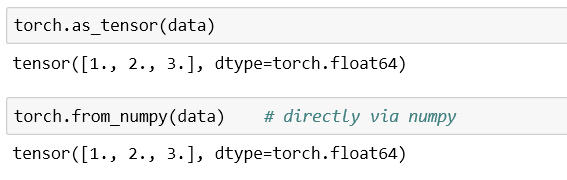
Other method, using torch.as_tensor and torch.from_numpy
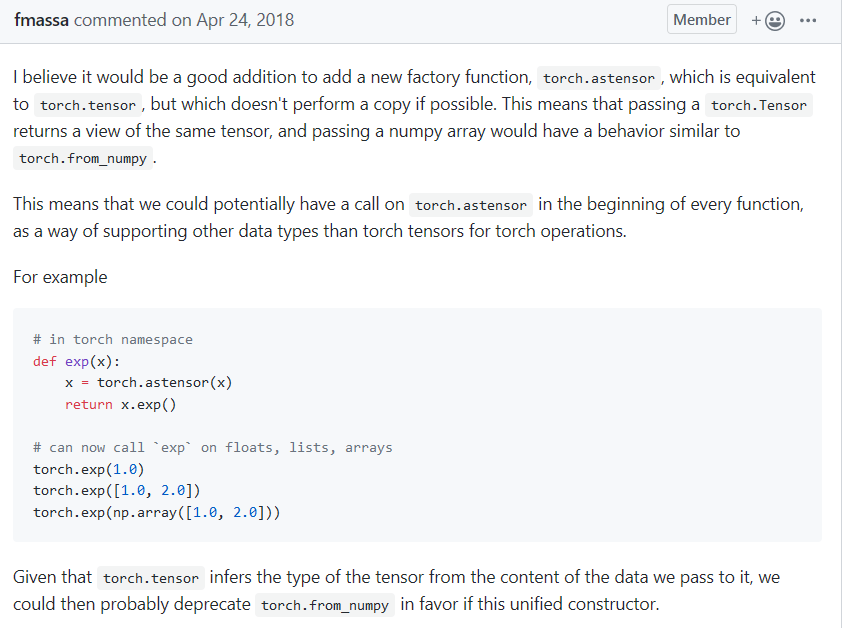
Woh! That’s a lot to take in!!…No! we are just getting started!!...Here, you might be wondering, how do we know when to use what from the above examples? The answer is, in general we usually use torch.tensor !! Here is a simple answer i could find online,
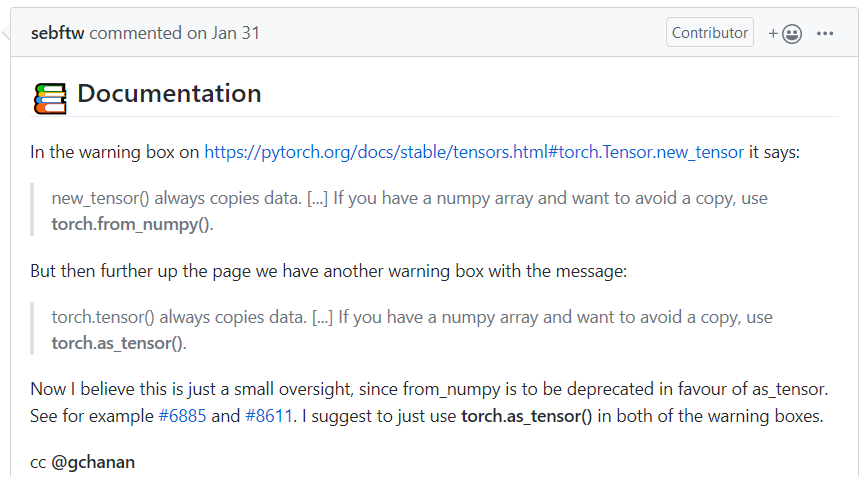
This one is a bit advance, but just look at the explanation for now…
Okey, but still when do we use it?
Let me make it easy for you to understand. What the above screen shots meant was this…
- torch.tensor has a tendency to create a copy and torch.as_tensor always avoids creating copy i.e., data is passed by reference, with a pointer pointing to the original location, similar to torch.from_numpy
- torch.as_tensor can take in any tensor data, whereas, torch.from_numpy takes in only numpy array as data.
- We use torch.Tensor when we want a default dtype and use torch.tensor or torch.as_tensor or torch.from_numpy when we just want to enter the data and let it know by its own.
- The other word you might be wondering about after reading the above explanations is “factory function”. All the above three works as a factory function creating a dynamic object on its own without the need for the specification of the dtype.
The Factory function pattern is a design pattern used to define a runtime interface for creating an object. It’s called a factory because it creates various types of objects without necessarily knowing what kind of object it creates or how to create it. Here is a link you might refer to understand factory functions better!
The above points are what you need to remember, but if you still insist on going deeper: From day-to-day use, torch.tensor() is generally used. But, for better performance torch.as_tensor() might be considered better!
Explanation:
- From the above data passing example, you might have seen that the numpy array we passed had a data type of numpy.ndarrays. Since, numpy.ndarrays objects are allocated in CPU, the as_tensor() function must copy data from CPU to GPU when GPU is being used.
- The memory sharing of as_tensor() doesn’t work with the built in python data structures like list.
- The as_tensor() call requires developer knowledge of the sharing features. This is necessary so we don’t inadvertently make an unwanted change in the underlying data without realizing the change impacts and multiple objects.
- The as_tensor() performance improvement will be greater when, there are a lot of back and forth operations between numpy.ndarray object and the tensor object. However, if there is just a single load operation, there shouldn’t be much impact from a performance perspective.
NOTE:Trying not to go too deep and confuse you guys, but at the same time clear the doubt I had when I first learnt about the above concepts in the most easiest ways as possible!
Creating tensors without existing data : Imagine where you don’t have an already existing data and want to push in some data to the tensor directly. Some of the ways to do so are:
- To return identity tensor/matrix: Hope you do remember what an identity matrix is?! Its a matrix with 1’s in its diagonal and 0’s in the rest of the places.

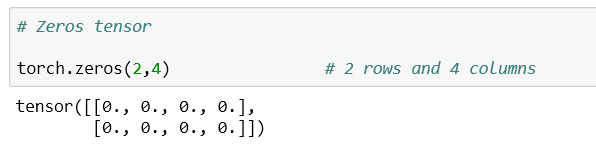
- To return tensor with zeros
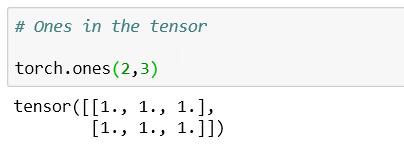
- To return tensor with ones
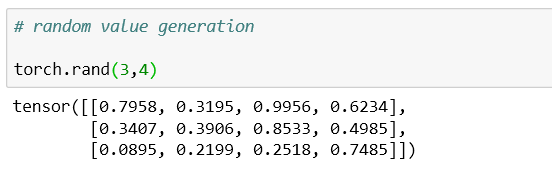
- To return tensor with random values
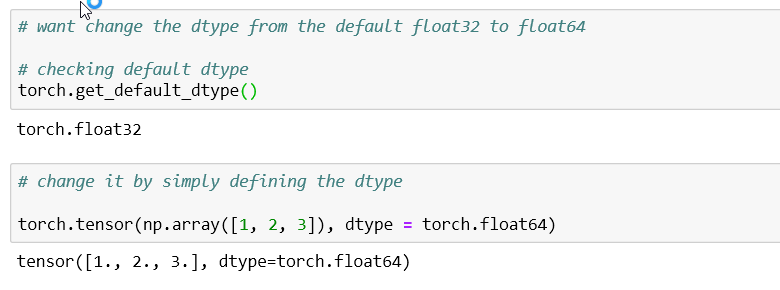
- To change the dtype of tensor from default to desired dtype
In all the above mentioned points from 1 to 5, the results were all in points i.e., were floats! Do you know why? If you don’t know why, then I suggest you take a closer look at them!
Here is a test for you guys……… Try answering without running the below question?

So, what do you think the answer might look like? Perhaps, did you think, all t1, t2, t3 & t4 will result a zero tensor!!
The answer is:

Explanation: In case of t1 and t2, i.e., torch.Tensor(data) and torch.tensor(data) , in both, the data is passed by value i.e., stores the copy of the original numpy array, so if any changes are to be made after the data has been copied, the values in t1 and t2 will not be effected.
Where as, as mentioned earlier, data in torch.as_tensor(data) and torch.from_numpy are passed by reference, i.e., a pointer is used to point to the original location keeping the data in check. Thus, when changes are made in the original numpy array, data in t3 and t4 also changes!!
Conclusion Now you know, How to create tensors and pass in values to them using PyTorch. You should also have a better understanding of torch.Tensor(data),torch.tensor(data),torch.as_tensor(data) and torch.from_numpy Feel free to ping me or leave a comment below, if you have any questions.
In the next blogpost of this series, we will look into tensor operations such as reshaping, flattening, squeezing, concatenation of tensors , etc.
So, stay tuned!! And, Happy Learning!
You may access the all the codes used in this blog post from here.